
Wainscoting is a classic home design feature that adds a touch of elegance and sophistication to any room. The best part is that you don’t have to be a professional carpenter to achieve the look. With some basic DIY skills and a bit of patience, you can easily master the art of DIY wainscoting and transform any room in your home. In this step-by-step guide, we’ll walk you through the process of installing wainscoting, from selecting the right materials and tools to measuring and cutting the panels, and everything in between. We’ll also share some tips and tricks to help you achieve a flawless finish and give your home a timeless look that you’ll love for years to come. So, let’s get started and master the art of DIY wainscoting!
1. Introduction to DIY wainscoting and its benefits
Wainscoting, a classic architectural feature, can instantly transform an ordinary room into a sophisticated and elegant space. If you’re looking to add character and charm to your home, mastering the art of DIY wainscoting is a worthwhile endeavor.
But first, what exactly is wainscoting? In simple terms, it refers to the decorative paneling that adorns the lower portion of interior walls. Traditionally, wainscoting was used to protect walls from the wear and tear of daily activities, such as chair backs and accidental bumps. However, it has evolved to become a design element that adds visual interest and depth to any room.
One of the greatest benefits of DIY wainscoting is the sense of accomplishment that comes with creating a custom look for your home. By taking on this project yourself, you have the freedom to choose the style, materials, and colors that perfectly suit your personal taste and complement your existing décor.
Additionally, DIY wainscoting is a cost-effective way to enhance your home’s value. Installing wainscoting can give your space a high-end, custom-built appearance without breaking the bank. With a little creativity and elbow grease, you can achieve a luxurious look that rivals that of expensive professional installations.
Moreover, wainscoting serves a practical purpose as well. It can help protect your walls from scuffs, scratches, and general wear, especially in high-traffic areas like hallways and dining rooms. It also acts as a visual barrier, dividing the wall into distinct sections and adding a sense of proportion and balance to the overall design.
In this step-by-step guide, we will walk you through the process of DIY wainscoting, providing you with valuable tips and tricks along the way. Whether you’re a seasoned DIY enthusiast or a newbie looking to embark on your first home improvement project, this guide will equip you with the knowledge and confidence to master the art of DIY wainscoting and transform your space into a stunning showcase of craftsmanship.
2. Types of wainscoting styles and materials to consider
When it comes to DIY wainscoting, there are various styles and materials to consider, each adding its own unique touch to your space. Understanding the different options available will help you make an informed decision and choose the perfect wainscoting style that suits your taste and complements your overall interior design.
1. Beadboard: This classic style is characterized by narrow, vertical planks that have a charming, cottage-like appeal. Beadboard wainscoting adds texture and depth to your walls, creating a cozy and timeless atmosphere. It is typically made of wood or MDF (medium-density fiberboard) and is available in various heights and widths to suit your preferences.
2. Raised Panel: If you prefer an elegant and sophisticated look, raised panel wainscoting is an excellent choice. This style features framed panels with intricate detailing, giving your walls a refined and luxurious appearance. Raised panel wainscoting is commonly crafted from solid wood or wood composite materials and offers a variety of design options to match your desired aesthetic.
3. Flat Panel: For a more modern and streamlined look, flat panel wainscoting is a great option. This style consists of simple, flat panels that create a sleek and contemporary finish. Flat panel wainscoting is often made from MDF or plywood and can be customized with different panel sizes and configurations to achieve the desired visual effect.
4. Picture Frame: Picture frame wainscoting adds an artistic touch to your walls, resembling a series of frames mounted on the lower portion. This style allows you to showcase your creativity and personalize your space by adding decorative elements or artwork within each frame. Picture frame wainscoting can be made from a variety of materials, including wood, MDF, or even lightweight polyurethane moldings.
When selecting the materials for your wainscoting project, consider factors such as durability, budget, and maintenance requirements. Wood is a popular choice for its natural beauty and longevity, but MDF offers a more affordable and versatile option. Additionally, plastic or PVC wainscoting materials are available for those seeking a moisture-resistant solution, ideal for bathrooms or kitchens.
By exploring the various wainscoting styles and materials available, you can confidently embark on your DIY journey and create a stunning, customized wainscoting design that enhances the aesthetic appeal of your space.
3. Gathering the necessary tools and materials
Before you embark on your DIY wainscoting project, it’s crucial to gather all the necessary tools and materials. This will ensure that you have everything you need at hand, saving you time and frustration during the installation process.
First and foremost, you’ll need a measuring tape to accurately measure the dimensions of the wall where you’ll be installing the wainscoting. This will help you determine the amount of materials you’ll need, such as the length of the wainscoting panels and the height of the vertical stiles.
Next, you’ll need a level to ensure that your wainscoting installation is straight and even. A laser level can be particularly helpful as it provides a precise and visible guide to ensure your wainscoting is perfectly aligned.
For cutting the wainscoting panels and trim pieces, you’ll need a high-quality miter saw or a circular saw with a fine-toothed blade. These tools will allow you to make clean and precise cuts, resulting in seamless joints and a professional finish.
To secure the wainscoting panels and trim to the wall, you’ll need a reliable adhesive or construction adhesive. Make sure to choose an adhesive that is suitable for the materials you’ll be working with, whether it’s wood, MDF, or PVC.
Additionally, you’ll need a caulking gun and a tube of paintable caulk to fill any gaps between the wainscoting panels, trim pieces, and the wall. This will give your wainscoting a seamless appearance and prevent any moisture or drafts from seeping in.
Lastly, don’t forget about the finishing touches! You’ll need a paintbrush or a paint roller to apply the desired paint or stain color to your wainscoting. Choose a high-quality paint or stain that is durable and easy to clean, as wainscoting is often subjected to wear and tear.
By gathering all these essential tools and materials beforehand, you’ll be well-prepared to tackle your DIY wainscoting project with confidence and achieve stunning results. Remember, investing in high-quality tools and materials will contribute to the longevity and overall appearance of your wainscoting, making it a worthwhile endeavor.
4. Measuring and planning the wainscoting layout
When it comes to DIY wainscoting, accurate measurement and careful planning are crucial for a successful installation. Before diving into the project, take the time to measure and plan out the layout of your wainscoting panels.
Start by measuring the height of your walls. Wainscoting typically covers the lower portion of the wall, so determine how high you want your wainscoting to be. This can vary depending on personal preference and the overall aesthetic you want to achieve. Consider factors such as the ceiling height and the proportions of the room to ensure a balanced look.
Next, measure the length of each wall that will be adorned with wainscoting. Take note of any obstacles such as doors, windows, or electrical outlets that may affect the placement of the panels. It’s important to account for these elements in your layout to ensure a seamless and professional finish.
Once you have all the measurements, create a detailed plan or sketch of your wainscoting layout. This will serve as your visual guide throughout the installation process. Consider the number of panels you’ll need, their sizes, and the spacing between them. Keep in mind that symmetry and proportion are key to achieving an aesthetically pleasing result.
Additionally, consider the style of wainscoting you want to create. Whether you opt for traditional raised panel, board and batten, or a more modern shaker style, the layout will vary slightly. Research different designs and patterns to find inspiration and determine which style will best suit your space.
Remember, accuracy is key when measuring and planning your wainscoting layout. Take your time to ensure precise measurements and a well-thought-out design. This careful preparation will lay the foundation for a stunning DIY wainscoting project that will enhance the beauty and elegance of your space.
5. Preparing the walls for installation
Before diving into the exciting process of installing wainscoting, it is crucial to properly prepare your walls. This step is often overlooked but is essential to ensure a flawless and long-lasting installation.
Firstly, start by thoroughly cleaning the walls to remove any dirt, dust, or grease that may hinder the adhesion of the wainscoting panels. Use a mild detergent or a mixture of warm water and vinegar to wipe down the walls. Allow sufficient time for the walls to dry completely before moving on to the next step.
Next, inspect the walls for any imperfections such as cracks, holes, or uneven surfaces. It is important to address these issues before installing the wainscoting. Fill any cracks or holes with spackling compound and use a putty knife to smooth it out. For larger imperfections, consider using joint compound or plaster to achieve a seamless finish. Once the compound is dry, sand the patched areas to create a smooth and even surface.
In addition, it is recommended to prime the walls before installing the wainscoting. Primer not only enhances the adhesion of the wainscoting panels but also helps to seal the wall surface, preventing any moisture-related issues in the future. Choose a high-quality primer suitable for your wall type, and apply it evenly using a roller or brush. Allow the primer to dry completely before proceeding.
Lastly, take precise measurements of your walls and mark the desired height of the wainscoting using a level and pencil. This will serve as a guide during the installation process and ensure that your wainscoting is perfectly aligned.
By properly preparing your walls, you are setting the foundation for a successful and visually appealing wainscoting installation. Take your time with this step, as it will greatly impact the overall outcome of your DIY project.
6. Installing the baseboard and chair rail
Installing the baseboard and chair rail is a crucial step in mastering the art of DIY wainscoting. These elements not only add visual appeal but also provide protection to the walls from daily wear and tear.
To begin, gather all the necessary tools and materials, including a measuring tape, miter saw, nail gun, adhesive, and the baseboard and chair rail of your choice. Start by measuring the length of the walls where you will be installing the wainscoting.
Next, cut the baseboard and chair rail to the appropriate lengths using a miter saw. It is important to ensure precise cuts, especially for the corners, to achieve a seamless and professional-looking finish.
Before attaching the baseboard and chair rail, apply a strong adhesive to the backside. This will help secure them to the wall and prevent any future movement or gaps.
When positioning the baseboard, make sure it aligns with the bottom edge of the wainscoting panels. Use a level to ensure it is perfectly straight before securing it with a nail gun.
Similarly, place the chair rail on top of the wainscoting panels, ensuring it is parallel to the baseboard and at a suitable height for your desired aesthetic. Again, use a level to maintain a straight line and secure it with nails.
For corners and joins, you may need to make miter cuts to achieve a seamless connection between the baseboard and chair rail. Take your time and double-check the angles before making any cuts.
Once all the sections are in place, step back and admire your work. The baseboard and chair rail not only provide a polished look but also enhance the overall durability of your wainscoting.
Remember, attention to detail is key throughout the installation process. Take your time, measure accurately, and ensure everything is level and aligned. With patience and practice, you will master the art of DIY wainscoting and create a stunning visual impact in any room of your home.
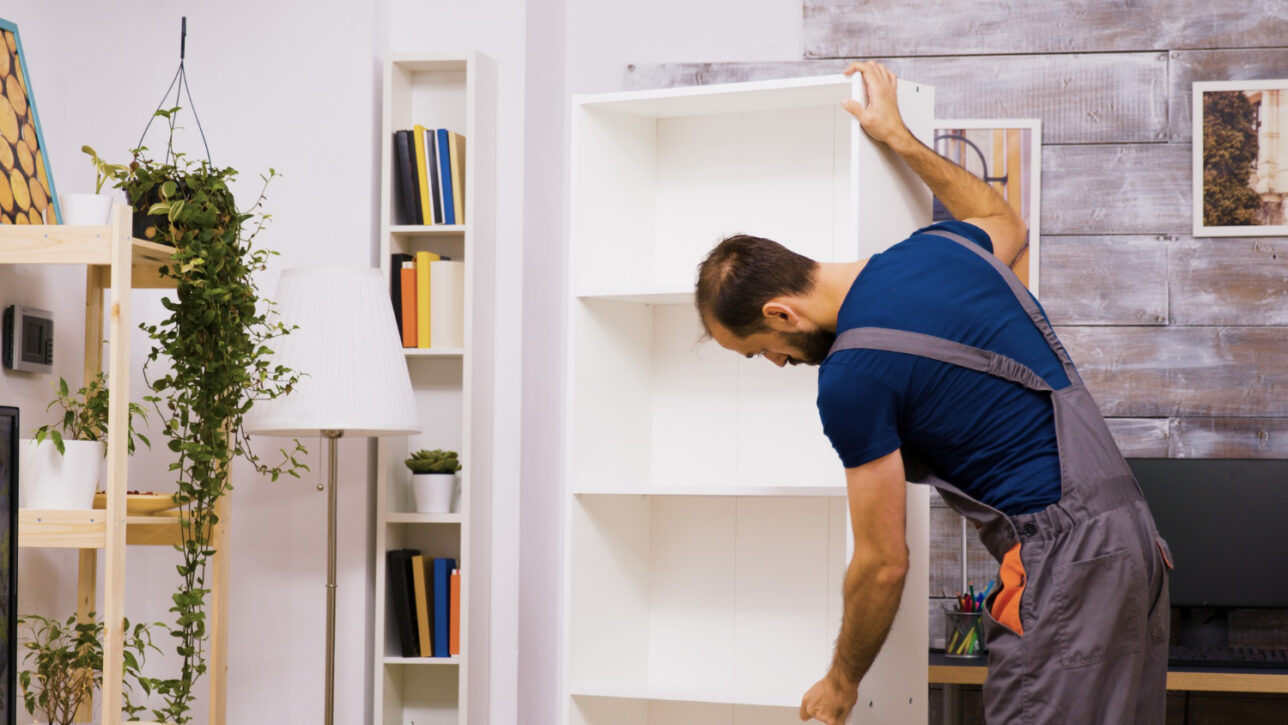
7. Adding the wainscoting panels or beadboard
Adding the wainscoting panels or beadboard is the next step in mastering the art of DIY wainscoting. This is where you will see your project really start to take shape and transform your space into a charming and elegant room.
First, measure the height of your desired wainscoting and mark it on the wall. Use a level to ensure accuracy and make sure the markings are straight. This will serve as your guide for installing the panels.
Next, cut your wainscoting panels or beadboard to the desired length using a saw. Be sure to measure twice and cut once to avoid any mistakes. It’s also a good idea to label each panel to keep track of their placement.
Apply a strong adhesive to the back of each panel and carefully press it against the wall, aligning it with the marked height. Use a level to check for any unevenness or misalignment. If needed, adjust the panel accordingly.
Once the first panel is securely in place, continue with the remaining panels, making sure to leave even gaps between them for a consistent and aesthetically pleasing look. You can use spacers or even coins as temporary placeholders while the adhesive dries.
If you’re using beadboard, you can add a decorative chair rail or baseboard trim to complete the wainscoting. Measure and cut these pieces to fit the length of each wall and attach them using a nail gun or strong adhesive.
After all the panels and trim are installed, fill any visible gaps or nail holes with wood filler. Allow it to dry completely and then sand the filled areas until smooth. This will ensure a seamless finish before painting or staining.
Remember, take your time during this step and double-check your measurements and alignment. Precise installation is key to achieving a professional-looking wainscoting design.
Once the panels and trim are securely in place, you can move on to the next step in your DIY wainscoting project, whether it’s painting, staining, or applying a protective finish. With each step, you’ll see your wainscoting come to life, adding depth and character to your space.
8. Installing the top rail and finishing touches
Once you have successfully installed the wainscoting panels and baseboard, it’s time to move on to the final step – installing the top rail and adding those finishing touches that will truly elevate the look of your DIY wainscoting project.
To install the top rail, measure the length of your wall and cut the rail accordingly. Ensure that it fits snugly against the top edge of your wainscoting panels. You can use a miter saw to make precise angled cuts on the corners for a seamless and professional finish.
Once the top rail is in place, secure it using a combination of construction adhesive and finishing nails. Apply a generous amount of adhesive to the back of the rail and press it firmly against the wall. Then, use finishing nails to reinforce its stability. Be sure to countersink the nails slightly and fill the holes with wood putty for a polished look.
After the top rail is securely installed, it’s time to add those final touches that will make your wainscoting truly stand out. Consider adding decorative molding or trim pieces along the top edge of the rail to add an extra layer of elegance. This can be achieved using a miter saw and some additional construction adhesive. Carefully measure and cut the molding to fit the desired length, then attach it to the top rail using adhesive. Allow it to dry completely before moving on.
To complete the look, give your wainscoting a fresh coat of paint or stain. Choose a color that complements your overall design scheme, whether it’s a classic white or a bold accent color. Apply the paint or stain evenly using a brush or roller, making sure to cover all surfaces and edges. Allow it to dry completely before removing any protective coverings.
Finally, step back and admire your masterpiece. The top rail and finishing touches have added depth and character to your wainscoting, transforming the entire space. Your DIY project has successfully brought a touch of elegance and sophistication to your home.
Remember, mastering the art of DIY wainscoting takes time and patience. Follow these step-by-step instructions and tips, and soon you’ll be able to showcase your skills and enjoy the beauty of your handcrafted wainscoting for years to come.
9. Tips and tricks for a professional-looking finish
When it comes to DIY wainscoting, achieving a professional-looking finish is key to creating a stunning and polished aesthetic in your home. Here are some tips and tricks to help you master the art of achieving that flawless end result.
1. Take accurate measurements: Before you begin installing your wainscoting, ensure that you measure the walls carefully. This will help you determine the correct height and width of each panel, ensuring a precise fit and a seamless look.
2. Choose the right materials: Selecting the right materials is crucial for achieving a professional finish. Opt for high-quality wood or MDF panels that are sturdy and durable. Consider the style and design of your space when choosing the type and thickness of the panels.
3. Invest in the right tools: Having the right tools at hand can make a world of difference in achieving a professional-looking finish. Ensure you have a miter saw, a level, a measuring tape, a nail gun or finishing nails, and a caulk gun. These tools will help you make precise cuts, maintain level lines, and secure the panels securely.
4. Sand and prime: Before painting or staining your wainscoting, it’s essential to sand the panels to create a smooth surface. This step helps to remove any imperfections and allows the paint or stain to adhere evenly. Additionally, applying a primer will ensure better paint adhesion and a professional-level finish.
5. Pay attention to detail: The devil is in the details, and this holds true for wainscoting as well. Take the time to fill any nail holes or gaps with wood filler and sand them smooth. Caulk any visible seams or joints to create a seamless appearance. These small touches will elevate the overall look of your wainscoting.
6. Paint or stain with care: The choice between paint and stain depends on your personal preference and the style you want to achieve. Whichever option you choose, apply the paint or stain with care, using even strokes and following the wood grain. Apply multiple thin coats for better coverage and a more professional finish.
7. Finishing touches matter: Lastly, don’t forget to add the finishing touches that tie the wainscoting together with the rest of your space. Consider adding a chair rail or crown molding to enhance the overall look. Additionally, choosing the right hardware, such as decorative hooks or knobs, can add that extra touch of elegance.
By following these tips and tricks, you’ll be well on your way to achieving a professional-looking finish for your DIY wainscoting project. With patience, attention to detail, and the right tools, you’ll create a stunning architectural feature that adds charm and character to your home.
10. Maintenance and care for your DIY wainscoting
Once you have successfully installed your DIY wainscoting, it’s important to understand the necessary maintenance and care to keep it looking its best for years to come. By following a few simple tips, you can ensure that your wainscoting remains a stunning addition to your home.
1. Regular Cleaning: Wainscoting is prone to collecting dust, dirt, and grime over time, especially in high-traffic areas. Regular cleaning with a soft cloth or sponge and mild detergent solution will help to keep it looking fresh and clean. Avoid using abrasive cleaners or harsh chemicals that can damage the finish.
2. Protect from Moisture: Wainscoting in bathrooms or other areas exposed to moisture requires extra attention. Ensure that the wainscoting is properly sealed and coated with a moisture-resistant finish to prevent water damage. Promptly wipe up any spills or splashes to prevent water from seeping into the wood.
3. Inspect for Damage: Periodically inspect your wainscoting for any signs of damage, such as cracks, chips, or loose panels. Addressing these issues promptly will prevent further damage and maintain the overall appearance of your wainscoting. Repair any small damages using wood filler and touch-up paint that matches the existing finish.
4. Refinishing: Over time, the finish on your wainscoting may wear off or become dull. Consider refinishing the wainscoting to restore its original luster. Start by gently sanding the surface to remove any imperfections, then apply a fresh coat of paint or stain according to your desired look.
5. Preventive Measures: To minimize the risk of damage, take preventive measures such as using furniture pads to protect the wainscoting from scratches caused by moving furniture. Avoid hanging heavy objects directly on the wainscoting to prevent potential damage.
By incorporating these maintenance and care tips into your routine, you can ensure that your DIY wainscoting remains a beautiful and durable feature in your home. With a little effort, you can enjoy the timeless elegance of wainscoting for years to come.
We hope you found our step-by-step guide and tips on mastering the art of DIY wainscoting helpful and inspiring. By following our instructions and incorporating our valuable tips, you can transform any room in your home into a stunning and elegant space. DIY wainscoting not only adds character and visual appeal to your walls but also gives you the satisfaction of completing a beautiful home improvement project on your own. So, gather your tools, unleash your creativity, and embark on this exciting journey to elevate the aesthetics of your living space. We can’t wait to see the remarkable results you achieve!


